
A couple of weeks ago I posted a guide explaining how to set up an always-on Discord bot. There we used a Flask server to keep the bot running indefinitely by pinging it every 5 minutes. Today we are going a step further to get an API up and running using a Flask server and Python so we can transfer and receive data between different applications or make it available to the web.
For this guide, we will stick with the basics. This means no databases (only a CSV file), no writing commands like POST, PUT, DELETE or deployment to production. Also, I will be using a single row to just store some of my personal data and if any cells have more than one element they will be divided with commas.
Preparing the CSV and data
dan_data.csv has an extremely simple structure with only one row of data. Later we are going to replace it with a proper database to make our API more flexible and secure. For now, it looks like this:

Setup code hosting with repl.it
Like with our bot, we will be hosting the API on good old repl.it because it is easy to set up and, most importantly, free to use.
Register and create a new repl. You can drag and drop the csv in the project folder. In the console tab run the following lines to install all the packages, we are going to use.
pip3 install flask-restfulpip3 install flaskWith Flask we will set up a server and run a REST API on it. We are using Flask because it is incredibly easy to set up and run, but also offers options like configuring an API, all from the python code with no separate config files.
pip3 install pandasPandas is a powerful data analysis and visualization tool usually used for machine learning but for our purposes, it will be great for reading the data from the csv file.
Start a Flask server
Now, we are ready to start the Flask server. In repl.it I created a main.py in which I imported all the packages we will be using.
import json
import pandas as pd
from threading import Thread
from flask import Flask, request, jsonify
First, create a flask object:
app = Flask('')Define the run routine:
def run():
    app.run(host='0.0.0.0', port=8888)
Leave the host IP 0.0.0.0 if you don’t have a custom IP setup. It will route automatically to your machines (or VMs) public IP. Pick an unused port like 8080, 8888 or 8008. You can also find a full list of options here. It can take some trial and error to find an available one sometimes.
Finally, I added the start routine on a separate Thread that triggers the run() function we declared earlier. This way our server is running independently of the rest of the program after the start code is executed and we can continue executing the main code.
def start_server():
t = Thread(target=run)
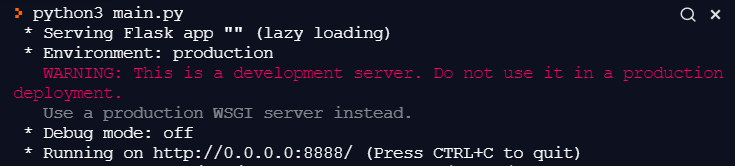
t.start()This is it. When the start_server() function is run, a Flask server is started with an output like this:
Setup the API commands
Setting up functions for different API commands in Flask is really easy and follows the same structure. I set up the GET command for this tutorial because it is the easiest to implement and test.
For commands that make changes to the data, it is better to first build a proper database with a better structure than a simple csv that we are using right now but the logic is the same if you want to proceed with it.
@app.route('/', methods=['GET'])
def query_records():
    name = request.args.get('get')
    if name != None:
        return get_data(name)
    else:
        return get_data_default()
All our commands will be run at the root address (https://DanAPI.ransaked1.repl.co/ in my case) and “methods” declares what type of request is to be run. After it flagged appropriately with the “@”, we can define a function that will run when a GET command is sent to this address.
After reading the arguments, if there are any, we can deal with the request like we would usually do with python and return the answer in JSON format which is easy to convert and read in a modern browser.
def get_data(name):
    data = pd.read_csv('dan_data.csv')  # read CSV
    data = data.to_json()  # convert to JSON
    loaded_data = json.loads(data) # load the JSON

    for record in loaded_data:    # go through the fields available
        if record == name:
            str = loaded_data[name]['0'] # get the data as string
            # parse data if it is a list delimited by commas
            if ',' in str:
                list = str.split (",")
                res = json.dumps(list)
            else:
                res = str
            return jsonify({name: res})   # return the data requested
    return jsonify({'error': 'data not found'})   # error if serched field not found
I also added a default get_data_default() that will return all the contents of the csv in JSON format if no specific search is specified.
#Default GET behaviour
def get_data_default():
    data = pd.read_csv('dan_data.csv')  # read CSV
    data = data.to_json()   # convert to JSON
    loaded_data = json.loads(data)   # load the JSON
    return jsonify(loaded_data)   # return all CSV contents
Now all that’s left is to test our API’s GET request…
Test the API
You will probably want to test your API while working on it without typing requests like ‘https://DanAPI.ransaked1.repl.co/?get=name’ and wonder if it works properly.
To send requests to the API and check the responses or error messages we will use Postman. You can download it here.
After setting it up on your PC, create a GET request like this:

DONT FORGET TO START THE FLASK SERVER FIRST!
You can create multiple different requests through Postman and even combine them to narrow down the search when working with more complicated databases in your API but all of this behaviour has to be defined in the python code first before trying out.
Conclusion
Here you have it, a simple Flask API using a csv. You can find the full code on repl.it but the order of the functions is not that critical for this program.
The next improvements needed are obviously a proper database behind it with a proper structure but this is a guide for another week as I’ll continue building on this Dan API in the future to provide more interesting data and interactions between a future project that might need or collect my data.
We will also have to complete the other commands but we have to secure the API first before making it public to protect it from unauthorized changes or only keep the GET command endpoint. This decision depends on what you are building but it is best to limit how much the open internet can interact with your API for best security and to avoid any data leaks.
Happy coding and a good day!